
Flutter, developed by Google, is an open-source toolkit used to create beautiful, natively compiled applications for mobile, web, and desktop from a single codebase. With the increasing demand for cross-platform applications, Flutter’s popularity has soared.
This guide aims to help beginners get started with Flutter, providing an easy-to-follow tutorial, examples, and insights to kickstart your journey in app development. This guide is particularly useful for developers in the USA looking to create impactful applications across various platforms.
What is Flutter?
Flutter is a comprehensive framework that allows developers to build highly performant applications with expressive and flexible user interfaces (UIs). It uses the Dart programming language, also developed by Google.
Flutter’s main advantage is its ability to provide a unified experience across different platforms (iOS, Android, web, and desktop) without compromising on performance or design.
Why Choose Flutter?
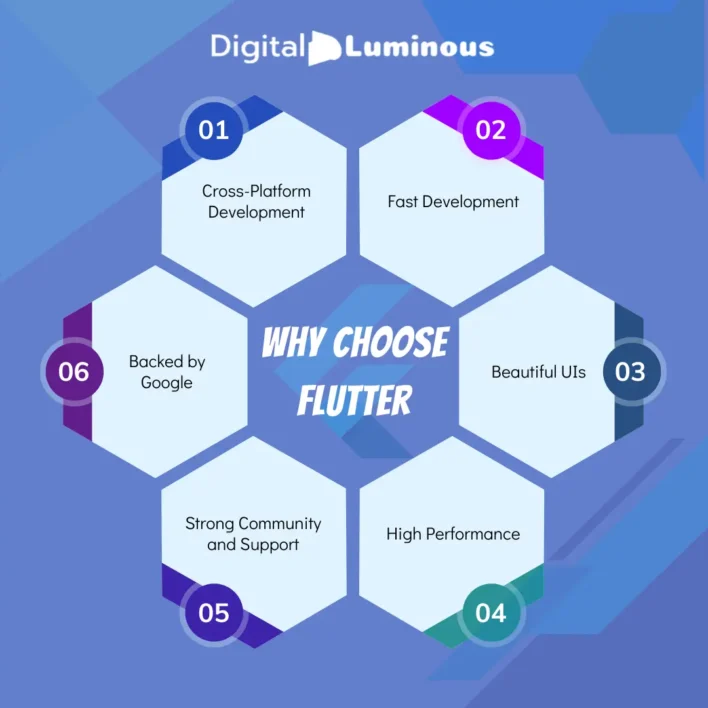
1. Cross-Platform Development
Flutter enables you to write code once and deploy it across multiple platforms. This means you can create applications for different platforms using the same codebase, significantly reducing development time and effort.
2. Fast Development
Flutter offers a hot reload feature, allowing developers to see changes in real-time without restarting the app. This accelerates the development process and enhances productivity.
3. Beautiful UIs
Flutter provides a rich set of customizable widgets that enable developers to create visually appealing and consistent UIs.
4. High Performance
Flutter applications are compiled directly to machine code, ensuring high performance and smooth animations.
5. Strong Community and Support
Flutter boasts a robust community of developers who contribute to its growth and provide support through forums, tutorials, and plugins. This vibrant community makes it easier for newcomers to find resources and get help when needed.
6. Backed by Google
Being developed and supported by Google adds to Flutter’s credibility and reliability. Google uses Flutter for several of its applications, which speaks volumes about its effectiveness and trustworthiness.
Getting Started with Flutter Development: Setting Up Flutter
Step 1: Install Flutter
To get started with Flutter, you need to install the Flutter SDK. Here’s a simple guide:
For Windows:
- Download the Flutter SDK from the official Flutter website.
- Extract the zip file and place it in a desired installation location, for example, C:\src\flutter.
- Add Flutter to your PATH:
- Open the Start search bar, type “env”, and select “Edit environment variables for your account”.
- Under User variables, find the Path variable, select it, and click Edit.
- Add the full path to the flutter\bin directory (e.g., C:\src\flutter\bin).
For macOS:
- Download the Flutter SDK from the official Flutter website.
- Extract the zip file and place it in a desired installation location, for example, ~/development/flutter.
- Add Flutter to your PATH:
- Open a terminal window.
- Run nano $HOME/.bash_profile to open the profile settings.
- Add the following line to the end of the file: export PATH=”$PATH:pwd/flutter/bin”.
- Save and close the file, then run source $HOME/.bash_profile to refresh the terminal.
For Linux:
- Download the Flutter SDK from the official Flutter website.
- Extract the tar file and place it in a desired installation location, for example, ~/development/flutter.
- Add Flutter to your PATH:
- Open a terminal window.
- Open your .bashrc file by running nano ~/.bashrc.
- Add the following line to the end of the file: export PATH=”$PATH:pwd/flutter/bin”.
- Save and close the file, then run source ~/.bashrc to refresh the terminal.
Step 2: Install an Editor
Flutter supports various editors, but the most popular ones are Visual Studio Code and Android Studio.
Visual Studio Code:
- Download and install Visual Studio Code.
- Install the Flutter and Dart plugins:
- Open Visual Studio Code.
- Go to the Extensions view by clicking the Extensions icon or pressing Ctrl+Shift+X.
- Search for “Flutter” and click Install. The Dart plugin will be installed automatically along with Flutter.
Android Studio:
- Download and install Android Studio.
- Install the Flutter and Dart plugins:
- Open Android Studio.
- Go to File > Settings > Plugins.
- Search for “Flutter” and click Install. The Dart plugin will be installed automatically along with Flutter.
Step 3: Create Your First Flutter App
Now that you have installed Flutter and set up your editor, it’s time to create your first Flutter application.
- Open your terminal or command prompt and navigate to the directory where you want to create your new Flutter project.
- Run the following command to create a new Flutter project:
- For example: flutter create my_first_app
- Navigate to the project directory:
- For example: cd my_first_app
- Open the project in your editor (e.g., Visual Studio Code or Android Studio).
- Run the app:
- In Visual Studio Code, open the main Dart file (lib/main.dart), and click the Run icon or press F5.
- In Android Studio, open the main Dart file, and click the Run button in the toolbar.
Step 4: Understanding the Project Structure
Here’s a brief overview of the project structure of a Flutter application:
- lib/main.dart: This is the main entry point of the application. It contains the main function and the root widget of the app.
- pubspec.yaml: This file contains metadata about the project, such as the project name, description, version, and dependencies.
- lib: This directory contains the Dart files for your app. The main.dart file is located here by default.
- android and ios: These directories contain the platform-specific code for Android and iOS.
Creating More Complex UIs Using Flutter Development
Now that you have successfully created and run a basic Flutter app, let’s explore how to build more complex user interfaces. We’ll create a simple weather app that displays the weather information for different cities in the United States of America.
Designing the UI
Imagine a weather app that lists major cities like New York, Los Angeles, Chicago, Houston, and Phoenix. When you tap on a city, it navigates to a new screen displaying detailed weather information for that city.
Mocking the Weather Data
For the purpose of this guide, we’ll assume the weather app displays mock weather data for each city. For instance, it could show “Sunny, 75°F” for New York or “Cloudy, 68°F” for Los Angeles. In a real-world scenario, you would typically use an API to fetch live weather data.
Running the App
You can run this more complex app on an emulator or a physical device to see the weather information displayed on the screen.
- In Visual Studio Code, click the Run icon or press F5.
- In Android Studio, click the Run button in the toolbar.
Adding More Features to Your Flutter App
Implementing Navigation
Navigation is a crucial part of any application. In our weather app example, tapping on a city name should navigate to a new screen showing detailed weather information. This navigation feature enhances user experience by making the app more interactive and user-friendly.
Customizing the UI
Flutter allows extensive customization of the user interface. You can change the colors, fonts, and layouts to match your brand or the specific needs of your application. For example, you might want to use different themes for different times of the day or change the layout based on the screen size and orientation.
Integrating APIs
To make your app more functional and dynamic, you can integrate various APIs. For example, in our weather app, you could use an API like OpenWeatherMap to fetch real-time weather data. This would provide users with up-to-date and accurate weather information.
Handling User Input
Flutter provides various widgets to handle user input, such as text fields, buttons, and forms. You can use these widgets to collect information from users and perform actions based on their input. For instance, in our weather app, you could add a search feature that allows users to look up the weather for any city in the United States of America.
Storing Data Locally
Sometimes, you may need to store data locally on the user’s device. Flutter supports various methods for local storage, such as shared preferences and SQLite databases. This feature is useful for caching data or saving user preferences.
Implementing Animations
Animations make your app more engaging and visually appealing. Flutter provides powerful tools for creating complex animations with minimal effort. You can use animations to highlight important information, provide feedback, or simply enhance the overall user experience.
Testing Your App After Flutter Development
Testing is a crucial part of the development process to ensure your app works correctly and provides a good user experience. Flutter supports various types of testing:
Unit Testing
Unit tests check the correctness of individual components or functions. They are fast and help ensure that your app’s logic works as expected.
Widget Testing
Widget tests verify the behavior of individual widgets. They check that the UI components render correctly and respond to user interactions as expected.
Integration Testing
Integration tests check the entire application, including how different components interact with each other. They simulate real-world usage scenarios to ensure that your app works correctly as a whole.
Deploying Your Flutter App
Once you have developed and tested your app, it’s time to deploy it to the respective app stores.
Android Deployment
To deploy your app on the Google Play Store, you need to:
- Generate a signed APK: This is a secure version of your app that can be distributed.
- Create a Google Play Developer account: You need to register and pay a one-time fee.
- Upload your app: Follow the instructions on the Google Play Console to upload and publish your app.
iOS Deployment
To deploy your app on the Apple App Store, you need to:
- Enroll in the Apple Developer Program: This requires an annual fee.
- Prepare your app for release: Generate a distribution certificate and provisioning profile.
- Upload your app: Use Xcode to upload your app to App Store Connect, then follow the instructions to submit it for review.
Web and Desktop Deployment
Flutter also supports web and desktop applications. You can deploy your web app on various platforms like Firebase Hosting, Netlify, or GitHub Pages. For desktop apps, you can create installers for Windows, macOS, and Linux and distribute them through your website or other channels.
Learning Resources For Flutter Development
To continue your journey with Flutter, here are some valuable resources:
Official Flutter Documentation
The official Flutter documentation is comprehensive and regularly updated. It covers everything from installation to advanced topics.
Flutter YouTube Channel
The Flutter YouTube channel offers tutorials, webinars, and talks from the Flutter team and community.
Online Courses
Platforms like Udemy, Coursera, and Pluralsight offer courses on Flutter development, ranging from beginner to advanced levels.
Community and Forums
Join Flutter communities on platforms like Reddit, Stack Overflow, and Discord. Engaging with the community can provide support, inspiration, and collaboration opportunities.
Flutter is a powerful and flexible toolkit for building beautiful, natively compiled applications for multiple platforms from a single codebase. With its fast development cycle, expressive UIs, and high performance, Flutter is an excellent choice for developers in the USA and worldwide.
By following this guide, you’ve learned how to set up Flutter, create your first app, and understand the project structure. As you continue your journey with Flutter, you’ll discover more advanced features and capabilities that will help you build even more sophisticated applications.
Remember, the key to mastering Flutter is practice and continuous learning. Keep experimenting with new features, building more complex applications, and staying updated with the latest developments in the Flutter ecosystem. Happy coding!
FAQs
What is Flutter?
Flutter is an open-source toolkit from Google to build natively compiled applications for mobile, web, and desktop from a single codebase. It uses the Dart programming language and provides a unified experience across platforms like iOS, Android, web, and desktop, all while maintaining high performance and visually rich UIs.
Why should I choose Flutter for app development?
Flutter offers cross-platform development, meaning you can write code once and deploy it on multiple platforms. Additionally, it features fast development with hot reload, high performance, beautiful UIs, and strong community support, making it a powerful and time-saving tool for app developers.
How do I install Flutter on Windows?
To install Flutter on Windows, download the Flutter SDK from the official site, extract it, and add the Flutter bin directory to your system’s PATH variable. This allows you to run Flutter commands in your terminal, enabling you to start building apps quickly.
How do I install Flutter on macOS?
For macOS, download the Flutter SDK, extract it, and add the Flutter bin directory to your PATH in the .bash_profile file. Then, refresh your terminal using the source command. After that, you can begin using Flutter on your macOS device.
How do I set up an editor for Flutter development?
You can use either Visual Studio Code or Android Studio for Flutter development. Install your preferred editor, then add the Flutter and Dart plugins to enable code completion, debugging, and other useful features specific to Flutter.
How does Flutter’s hot reload feature benefit development?
Flutter’s hot reload allows developers to instantly view changes in their app without restarting it. This feature accelerates development by enabling quick iterations, debugging, and experimentation with UI changes and logic modifications.
How can I integrate APIs into my Flutter app?
To integrate APIs, you can use Flutter’s HTTP package to send requests to web services. For instance, to fetch live weather data in a weather app, you could connect to an API like OpenWeatherMap and display dynamic content on the UI.
What are Flutter's navigation capabilities?
Flutter offers a robust navigation system that allows developers to create dynamic navigation between screens. Using Navigator and routing, developers can push and pop pages, enabling complex and fluid navigation in apps with multiple screens.
How can I store data locally in Flutter?
Flutter supports local storage options such as Shared Preferences for simple key-value data and SQLite for more complex data storage. These methods are useful for caching data or saving user preferences for offline usage.
What testing options does Flutter provide?
Flutter supports unit testing (for individual functions), widget testing (for UI components), and integration testing (for testing the entire app). These help ensure that the app works as expected across different layers and in real-world scenarios.
How can I deploy my Flutter app on Android and iOS?
To deploy your Flutter app on Android, generate a signed APK file, create a Google Play Developer account, and follow the Google Play Console instructions to upload and publish the app on the Play Store.
For iOS, you must enroll in the Apple Developer Program, generate a distribution certificate, prepare your app for release in Xcode, and submit it via App Store Connect for review before publishing it on the App Store.
Why is Flutter backed by Google important?
Google’s backing of Flutter ensures that it remains a reliable, cutting-edge framework. Google uses Flutter for its own apps, which adds credibility, stability, and ongoing development to the platform, making it a trustworthy choice for developers worldwide.


 Design in 2025)